PREPARE A REFERENCE GENOME
The last thing we can do for the incoming analyses is to prepare a bowtie index of your Drosophila genome, which will be available Galaxy-wide.
Alignment programs and a number of other tools use their own specific index, to speed up their tasks. Thus, since you will align later reads using bowtie, you should prepare a bowtie genome index.
In Galaxy, indexing tasks are preceeded by a "fetch and dbkey" task, whose purpose is to implement the Galaxy database and inform it of the existence of this genome and of possible derived indexes.

1.  Prepare the Drosophila genome dmel-all-chromosome-r6.54 for indexation.
In the history REFERENCES we have uploaded a dmel-all-chromosome-r6.54 dataset. If you
click on the name of the dataset, you will expand the (green) dataset box and see that it
is a fasta format dataset which contains 1870 sequences.
Indeed, the dataset contains the main Drosophila chromosomes X, Y, 2 (L and R), 3 (L and R) and 4, but also many unmapped contig sequences and possibly some minor haplotypes.
Thus, before indexing our Drosophila genome, we are going to clean it a little bit by,
- simplifying the fasta headers (keeping only the characters before the first space)
- and explicitly picking only the aforementioned chromosomes.
A. simplify fasta headers
We will first need to use a Galaxy tool that is able to do advanced search/replacement
using regular expressions. This tool is Regex Find And Replace.
However, if you search for "regex" in the search box of the tool panel, you will not be able to find this tool !
This is on purpose, to show you how to install missing tools in your Galaxy server, by connecting to the Galaxy toolshed (a kind of app store for Galaxy) and fetch them from this tool shed.
Installing the Regex Find And Replace tool
- Click on the
Admintop menu - In the left bar click on
Install and Uninstall - Verify that the radio button
Search Allis checked (this is the case by defaults) - In the search field, copy and paste
- Select the tool owned by
galaxyp(this is the one we want). and click theinstallbutton of the lattest revision5, version1.0.3 - In the
Target Section:menu, selectAG 2023. Thus, the tool will appears in the sectionAG 2023of your Galaxy tools. - Click
OK - In the next few seconds, you will notice that the status goes through various stages/colors. This can be quick and you may miss it...
- Rapidly enough, the
Installbutton should turn to a redUninstallbutton. - You can now check the
Installed Onlyradio button at the top, and look at the newly installed toolregex_find_replacein the list.
-
Click on the house button
 and Go
to the
and Go
to the REFERENCEhistory. To navigate between your histories, you have many options, including the top menu "Utilisateurs":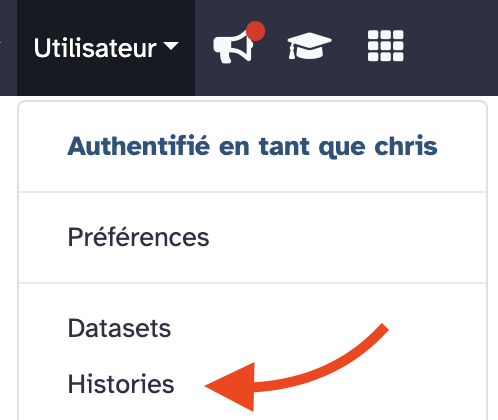
or the double-arrow menu in the history right bar:

-
Select the tool
Regex Find And Replace (Galaxy Version 1.0.3) in the tool
sub-menu Analyse des Génomes. Note that now that the tool is installed, you can find it by typingRegex Find And Replacein the search box at the top of the tool bar.
fill the form of [Regex Find And Replace]
- Select lines from:
1. dmel-r6.54 - Check: Click
Insert Check -
Find Regex:
 this is one space, followed by a dot, followed by a sign plus.
 -
Replacement: Nothing
be sure that the remplacement box is empty - Click

Run Tool
- Now, you can use the
 icon to compare the new dataset with the initial genome dataset.
What can you say, at least for the chromosome 2L ?
The visible header is now >2L.
It was >2L type=golden_path; loc=2L:1..23513712; ID=2L; dbxref=GB:AE014134,GB:AE014134,
REFSEQ:NT_033779; MD5=b6a98b7c676bdaa11ec9521ed15aff2b; length=23513712; release=r6.54; species=Dmel;
before !
- Create a short list of string "on the fly" with [Upload Data]
- Click the
Upload Datamenu - Click the
Paste/Fetch Databutton - Give a name to the dataset (
chromosome_listin replacement ofNew File) - In the main Paste field copy this list:
- Click the Start dark blue button
- Select the tool Pick Fasta sequences with header satisfying a string query
(Galaxy Version 3.0.3) in the tool sub-menu
Analyse des Génomes. You may also use The tool search box.
Fill the form of Pick Fasta sequences
- Source file:
14. Regex Find And Replace on data 1 - for a: Check
list of string - retrieve sequences whose headers...:
exactly+contain one of this list string - list of strings dataset:
13. chromosome_list - Click

Execute
- Rename the created dataset using the pencil icon
 as
as dmel-MAIN-chromosome-r6.54
What can you notice if you look at dmel-MAIN-chromosome-r6.54 ?
The number of fasta sequence is 7 sequences
How can we check that the right chromosomes have been collected in the dataset ?
Use the Select lines that match an expression (Galaxy Version 1.0.3)
- Select lines from:
dmel-MAIN-chromosome-r6.54 - that:
Matching - the pattern:
^> - Keep header line:
No - Click
Run Tool
From the result, can you deduce the role of the caret sign ^ in the regular expression ?
B. Declare the dmel-MAIN-chromosome-r6.54 dataset as a reference to Galaxy.
Now that we have a "clean" Drosophila reference genome in fasta format, it is time to notice it to Galaxy. This is an administrator task which we are going to perform.
- Go to the
Adminmenu (in the top menu bar) - In the left bar of the
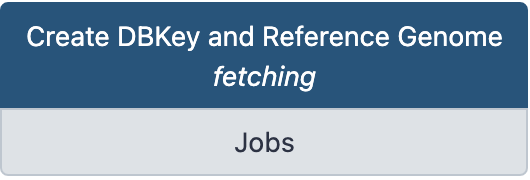
Adminboard, clickLocal Data - Click on the data manager tool Create DBKey and Reference Genome fetching
- Note that the form of the tool opens in a new browser window
Fill the form of Create DBKey and Reference Genome fetching
- Use existing dbkey or create a new one.:
New - dbkey: Choose a simple identifier such as
dmel-r6.54 - Display name for dbkey: Leave this field empty
- Name of Sequence: Leave this field empty
- ID for sequence: Leave this field empty
- Choose the source for the reference genome:
History - FASTA file:
dmel-MAIN-chromosome-r6.54 - Sort by chromosome name:
As is - Click
Run Tool
A new dataset is created, which contain the metadata of the new genome declared to Galaxy, in a json format. This dataset is just a report and is not specially important, it can even be deleted.
In contrast, if you go back to other Galaxy web page with the local data management board,
you can now click on the Tool Data Tables __dbkeys__ and all_fasta and see that the
Galaxy database now contains informations in these tables about the dmel-r6.54 reference
genome.
2. Index dmel-r6.54 for Bowtie.
Now that the dmel-r6.54 genome is referenced in Galaxy with a dbkey, it is easy to prepare corresponding indexes for the aligner Bowtie.
- Go back to the local data manager board
- Click on the data manager Bowtie index builder
Fill the form of Bowtie index builder
- Source FASTA Sequence:
dmel-r6.54(no other choice !) - Name of Sequence: Leave this field empty
- ID for sequence: Leave this field empty
- Click
Run Tool
→ A new dataset Bowtie index is created and the orange color and running wheel indicate
that the job is ongoing to create the bowtie index.
It will take several minutes.
Your Cloud Galaxy is now ready for analyses with the other trainers
3. After Work Sessions (review)
- Suspend your Google VM
Suspend VM instance
- Go to your Google cloud console (web interface))
- Click the 3 vertical dots in the line
bare-galaxyand selectSuspendre(orSuspendwith the english interface)
Keep in mind that a VM instance is charged by Google (on your coupon) when
it is running. If you SUSPEND your instance, there is no more cost of computing (calculated
in fonction of minutes of activity).
- At the end of the week (only), stop your VM instance
Stop your Google VM
- Go to your Google cloud console (web interface))
- Click the 3 vertical dots in the line
bare-galaxyand selectArrêter(orStopwith the english interface)
When all your instances are stopped, the cost of your storage devices (200 or 300 Gb)
is still recorded. Fortunately, this cost is reduced and you can keep your ~200 Gb
disk for many weeks with your coupon.
- Protect your instance from self-destruction pulsions
Protect your instance from unwanted destruction.
In some occasion, it is possible to be confused between arrêter and détruire a
VM. The consequences of unwanted VM destruction are irreversible as well as annoying.
To prevent this, you can protect your instance from the destruction command.
- Go to the Google Cloud Platform management web page.
- Click on the name of your VM.
- Click on the top menu
Modifier - Edit the
Protection contre la suppressionoption as follows:

(just at the end of the section Informations générales) and do not forget to save this new setting.
From this point, you will need to uncheck the box to destroy the instance and your are
protected against unwanted manifestations of bad karma  !
!